Converting a Nissan 240SX from automatic to manual enhances performance, driver control, and enthusiast satisfaction. This guide provides a comprehensive overview of the process, benefits, and requirements for a successful swap.
1.1 Why Convert to Manual Transmission?
Converting the 240SX to a manual transmission enhances performance, driver control, and enthusiast satisfaction. Manual transmissions offer better fuel efficiency, lower maintenance costs, and a more engaging driving experience. For enthusiasts, the swap is a popular modification to unlock the car’s full potential, especially for drifting and boosting horsepower. It provides a more direct connection to the vehicle, allowing for precise gear shifts and improved acceleration. Additionally, manual transmissions are often more durable and cost-effective in the long run, making the conversion a worthwhile investment for both performance and driving enjoyment.
1.2 Benefits of a Manual Transmission
A manual transmission offers numerous benefits, including improved fuel economy, lower maintenance costs, and increased driver engagement. It provides precise control over gear shifts, enhancing acceleration and performance. Manual transmissions are also more durable and less complex than automatics, reducing long-term repair expenses. For enthusiasts, the manual setup delivers a more immersive driving experience, making it ideal for drifting and performance driving. Additionally, manual transmissions are often lighter, contributing to better power-to-weight ratios. These advantages make the swap a desirable modification for drivers seeking enhanced control, efficiency, and driving satisfaction.
1.3 Overview of the Conversion Process

The 240SX auto-to-manual conversion involves replacing the automatic transmission with a manual setup, including a new transmission, clutch system, and driveshaft. This process requires careful planning, mechanical expertise, and specialized tools. Key steps include removing the automatic transmission, installing the manual transmission, and setting up the clutch system. Additional modifications, such as wiring harness adjustments and ECU reconfiguration, ensure proper functionality. The conversion is complex but rewarding, offering enhanced performance and driver control. Proper preparation and attention to detail are crucial to avoid complications and ensure a successful swap.

Planning the Swap
Planning the 240SX auto-to-manual swap involves assessing the project’s scope, budgeting, and gathering essential tools and parts. Thorough preparation ensures a smooth and successful conversion process.
2.1 Budgeting for the Conversion
Budgeting for a 240SX auto-to-manual swap can range from $400 to $4,000, depending on whether you use used or new parts and if professional labor is involved. A DIY approach with used parts typically costs $400-$500, covering essential components like the transmission, clutch kit, and driveshaft. However, opting for new or refurbished parts increases expenses to $1,000 or more. Additional costs include specialized tools and potential labor fees if hiring a mechanic. Researching part prices and labor rates in your area is crucial to avoid budget overruns and ensure all expenses are accounted for.
2.2 Essential Tools and Equipment Needed
Completing a 240SX auto-to-manual swap requires specific tools to ensure efficiency and safety. Essential tools include a transmission jack, socket set, torque wrench, flywheel puller, and clutch alignment tool. A floor jack and jack stands are necessary for lifting and supporting the vehicle. Additional items like wire, fluid catch pans, and spill mats are useful for managing fluids and debris. While some tools are optional, such as a transmission jack adapter, they can simplify the process. Always consult a 240SX repair manual for specific torque specifications and procedures to ensure accuracy.
2.3 Choosing the Right Manual Transmission
Selecting the correct manual transmission is crucial for a successful 240SX swap. The most compatible options are transmissions from manual-equipped 240SX models, ensuring drivetrain compatibility. For S13 models, an S14 manual transmission is often recommended due to its crank angle sensor compatibility. Always verify the transmission’s mileage and condition if used. Compatibility with your engine (KA24E or SR20DET) is essential to avoid performance issues. Consult forums or experts to confirm the best transmission for your specific setup. A properly matched transmission ensures smooth operation and optimal performance.

Parts Required for the Swap
Key components include a manual transmission, clutch kit, flywheel, driveshaft, and transmission mounts. Additional parts like a pedal assembly and wiring harness are also essential.
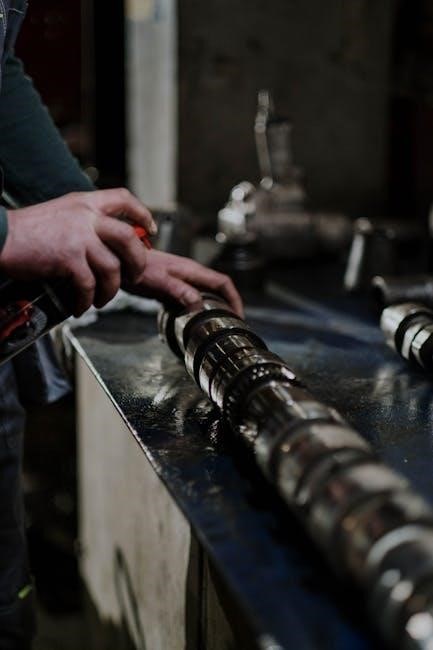
3.1 Manual Transmission and Components
The manual transmission is the core of the swap, requiring compatibility with your 240SX’s engine, such as the KA24E or SR20DET. Key components include the transmission itself, bellhousing, gear set, input shaft, and bearings. Ensure the transmission is sourced from a compatible model or refurbished to guarantee proper function. The clutch fork and gearshift mechanism are also essential for operation. Proper alignment and installation of these components are critical to avoid damage and ensure smooth shifting. Researching and sourcing a transmission with verified history or low mileage is highly recommended for reliability.
3.2 Clutch Kit and Flywheel
A complete clutch kit is essential for the manual swap, including a pressure plate, clutch disc, and throw-out bearing. The flywheel must be compatible with your engine and transmission type. Upgrading to a lightweight or performance flywheel can improve acceleration and reduce inertia. A pilot bushing ensures proper alignment between the transmission and engine. For reliability, consider a stainless steel clutch line to replace the factory unit. Proper installation requires precise torque specifications to avoid warping the flywheel or uneven wear on the clutch. Always verify compatibility with your specific 240SX model and engine configuration.

3.3 Driveshaft and Transmission Mounts
A new driveshaft is required for the manual swap, as the automatic transmission driveshaft is typically longer and incompatible. Ensure the driveshaft is specifically designed for your 240SX manual setup to prevent vibrations. Transmission mounts are also essential for securing the manual transmission properly. These mounts differ from automatic models and are crucial for maintaining alignment and reducing drivetrain vibrations. Proper installation ensures smooth operation and prevents premature wear on components. Always verify compatibility and consider consulting a driveshaft specialist for precise fitting and balancing to ensure reliability and performance.
Technical Steps of the Conversion
Removing the automatic transmission, installing the manual unit, and setting up the clutch system are the primary technical steps. This process requires precise alignment and careful handling to ensure proper functionality and avoid damage to components.
4.1 Removing the Automatic Transmission
Removing the automatic transmission is the first major step in the conversion process. Start by disconnecting the electrical connectors and shifting the transmission into neutral. Drain the transmission fluid and remove the driveshaft. Next, disconnect the cooler lines and mounting brackets. Carefully lift the transmission using a transmission jack, ensuring it is securely supported to prevent damage or injury. Remove the bellhousing bolts and slide the transmission straight back. Proper alignment and support are crucial to avoid damaging the engine or surrounding components. This step requires patience and careful handling to ensure a smooth transition to the manual setup.
4.2 Installing the Manual Transmission
Installing the manual transmission requires precise alignment with the engine’s bellhousing. Use a transmission jack or cherry picker to support the unit, ensuring it mates correctly with the engine. Secure the transmission using the appropriate bolts, tightening them in a star pattern to avoid warping the bellhousing. Connect the clutch slave cylinder to the clutch fork and ensure the driveshaft aligns properly with the transmission and differential. Double-check all connections and verify that the transmission is level and securely fastened. Proper installation ensures smooth operation and prevents potential damage to the drivetrain components.
4.3 Setting Up the Clutch System
Setting up the clutch system involves installing the flywheel, clutch disc, and pressure plate. Align the clutch disc with the flywheel splines and bolt the pressure plate securely. Install the throw-out bearing in the clutch fork, ensuring proper alignment. Bleed the hydraulic system to remove air bubbles, ensuring smooth clutch engagement. Tighten all bolts with a torque wrench, following the manufacturer’s specifications. Proper installation ensures precise control and prevents premature wear. Consult a repair manual for specific torque values and alignment instructions to guarantee a flawless setup.

Wiring and ECU Adjustments
Replacing the automatic wiring harness with a manual one is essential. The ECU must be reconfigured or replaced with a manual version for optimal performance. Consult wiring diagrams or professionals if needed.
5.1 Understanding Wiring Harness Modifications
Modifying the wiring harness is crucial for the manual swap. The automatic transmission’s wiring must be replaced or reconfigured to accommodate the manual setup. This involves installing a manual-specific harness that includes sensors for the clutch and gear position. Proper splicing and wiring modifications ensure compatibility with the manual transmission’s components. Detailed wiring diagrams specific to the 240SX model year are essential for accuracy. If unsure, consulting online forums or professional mechanics is recommended to avoid electrical issues and ensure a smooth conversion process. Precision is key to prevent future mechanical or electrical malfunctions.
5.2 ECU Configuration for Manual Transmission
ECU configuration is vital for a smooth auto-to-manual swap. The manual transmission requires specific engine mappings for optimal performance. Using a manual-specific ECU is recommended, as it provides accurate fuel and ignition settings. However, some enthusiasts modify the automatic ECU to work with the manual setup. Proper ECU tuning ensures correct throttle response and gear shifting. Improper configuration can lead to issues like poor acceleration or misfires. Consulting detailed guides or a professional tuner is advisable to achieve precise calibration tailored to your 240SX’s manual setup, ensuring reliability and peak performance.

Final Steps and Testing
After completing the swap, test the vehicle thoroughly. Ensure smooth clutch operation, proper gear shifting, and drivetrain functionality. Address any issues promptly for optimal performance and reliability.
6.1 Pedal Assembly Installation
Replacing the pedal assembly is essential for manual conversion. Remove the automatic pedals carefully, noting brake lines and electrical connections. Install the manual three-pedal assembly, ensuring proper alignment and linkage. The new setup includes clutch, brake, and accelerator pedals, along with mounting brackets and rods. Inspect for damage and ensure smooth operation. After installation, test the pedals under various driving conditions to confirm functionality. Proper adjustment prevents issues like excessive pedal travel or premature activation, ensuring a seamless driving experience.
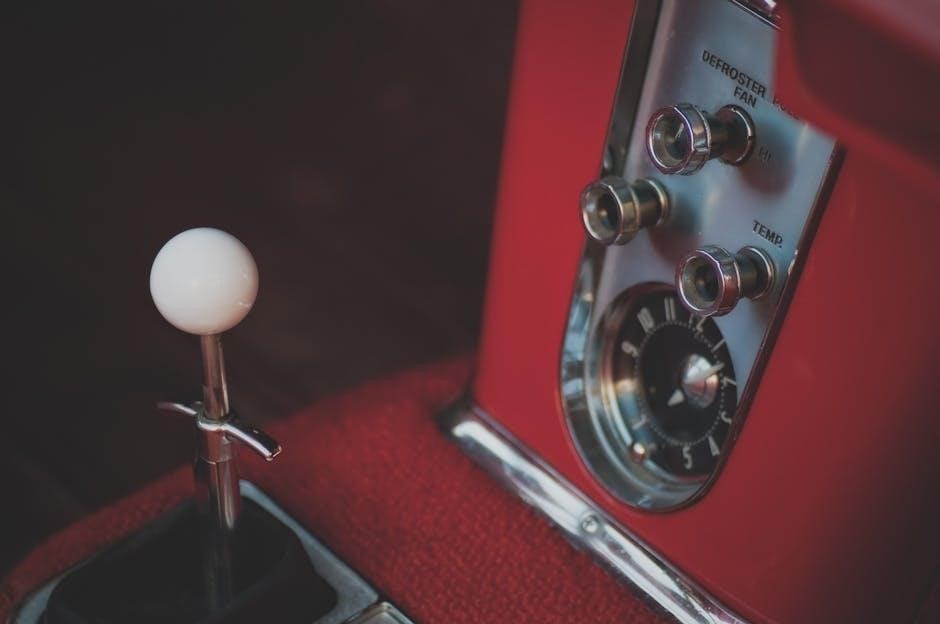
6.2 Driveshaft and Shifter Setup
The driveshaft and shifter setup is critical for proper functionality. A manual-specific driveshaft is required, as the automatic version is incompatible. Ensure the driveshaft is correctly measured and balanced for optimal performance. Professional shops can assist with sizing and balancing to prevent vibrations. Install the shifter mechanism, aligning it with the transmission and chassis. Secure all connections and test the system for smooth shifting. Proper setup ensures precise gear engagement and avoids drivetrain issues. Detailed alignment and secure fastening are essential for reliability and performance.
6.3 Testing and Troubleshooting
After completing the swap, conduct a thorough test drive to identify any issues. Check for fluid leaks, unusual noises, or erratic shifting. Common problems include improper clutch engagement, grinding gears, or slipping. Inspect all connections, ensuring the driveshaft, shifter, and clutch system are securely fastened. Bleed the clutch system if necessary to eliminate air bubbles. Verify proper ECU communication and wiring functionality. Addressing issues early prevents further complications. Repeat testing under various conditions to confirm smooth operation. Detailed troubleshooting ensures reliability and optimal performance of the manual setup.