The Taylor Test Kit is a reliable tool for water quality testing, providing accurate results for pH, chlorine, alkalinity, and calcium hardness. Easy to use and comprehensive, it ensures precise water analysis with clear instructions for optimal pool or spa maintenance.
1.1 Overview of the Taylor Test Kit
The Taylor Test Kit is a comprehensive water testing solution designed for precise measurement of key water parameters, including pH, chlorine, alkalinity, and calcium hardness. It includes reagents, test strips, and a comparator for accurate results. Popular among pool and spa owners, it ensures proper water chemistry management with clear, step-by-step instructions for reliable and consistent testing outcomes.
1.2 Importance of Following Instructions
Following the Taylor Test Kit instructions ensures accurate and reliable results, avoiding common errors like incorrect reagent use or test strip misinterpretation. Proper adherence guarantees precise water chemistry measurements, crucial for maintaining safe and balanced pool or spa conditions. Deviating from guidelines can lead to inaccurate data, potentially harming water quality and safety. Consistent compliance with instructions ensures optimal testing outcomes every time.
Preparing for the Test
Start by unpacking and inventorying all components, ensuring no reagents or tools are missing. Familiarize yourself with the equipment, reagents, and test strips provided in the kit.
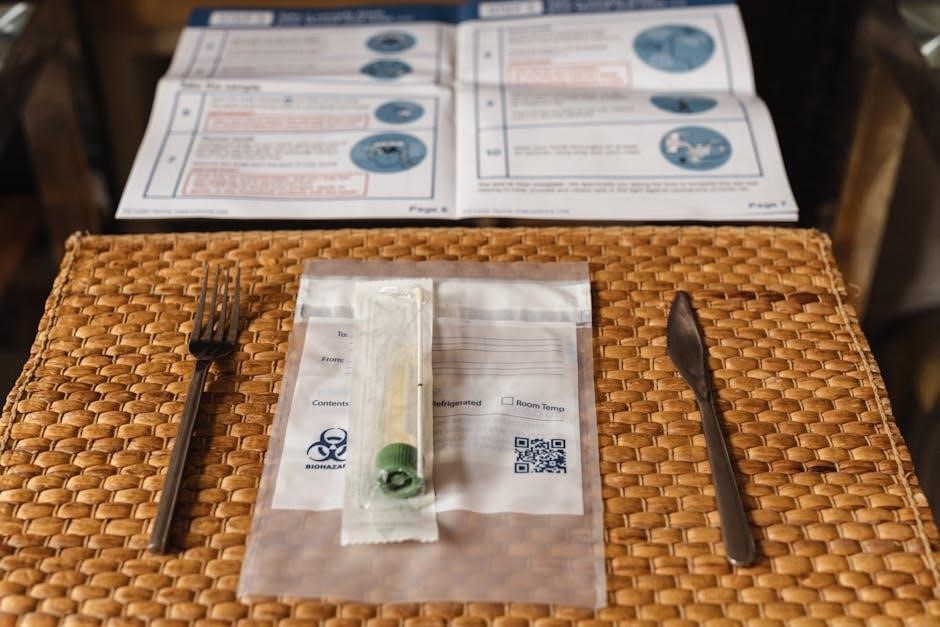
2.1 Unpacking and Inventory of Components
When unpacking the Taylor Test Kit, carefully check for all components, including reagents, test strips, and equipment. Ensure R001 and R002 reagents are present for accurate chlorine testing. Verify the kit contains the comparator, sample tubes, and instructions for proper functionality. Missing items like R001 or R002 may require replacement to ensure reliable test results.
2.2 Understanding Reagents and Equipment
Familiarize yourself with the Taylor Test Kit components, including reagents like R001, R002, and R003, used for chlorine, pH, and alkalinity testing. The kit includes a comparator for color matching, sample tubes, and test strips. Ensure all items are accounted for to avoid missing crucial parts. Proper storage and handling of reagents and equipment are essential for accurate and reliable test results.

Step-by-Step Testing Process
Begin by preparing samples and equipment, then follow the kit’s instructions for testing pH, chlorine, alkalinity, and calcium hardness. Ensure accurate results by carefully measuring reagents and comparing colors using the comparator. Each test step is designed to provide clear, actionable data for maintaining water quality.
3.1 Initial Setup and Calibration
Organize the Taylor test kit components and ensure all reagents are present. Rinse the comparator tubes thoroughly before use. Familiarize yourself with the color charts and calibration markers. For accurate results, always handle reagents carefully and wear gloves if needed. Double-check the kit’s instructions for specific calibration steps, as improper setup may lead to inaccurate readings. Refer to online resources if additional guidance is required.
3.2 Conducting pH and Chlorine Tests
For pH testing, fill the comparator tube with water, add pH reagent, and compare the color to the chart. For chlorine, use the DPD method: add a tablet to the sample, shake, and match the color. Ensure accurate measurements by using the correct number of drops or tablets. Regularly clean the comparator and refer to the kit’s guide for precise results. Proper technique is essential for reliable water quality assessments.
3.3 Measuring Alkalinity and Calcium Hardness
For alkalinity, add the indicator to the water sample until it turns blue, then titrate with the alkalinity reagent until the color changes. Record the number of drops used. For calcium hardness, follow a similar process using the calcium hardness reagent. Ensure accurate measurements by using the correct titration technique and referencing the color chart provided. Proper titration ensures reliable results for maintaining water balance and clarity. Regular practice improves precision.

Troubleshooting Common Issues
Missing reagents like R001 or R002 can hinder testing. Verify kit contents against the inventory list. If missing, contact the supplier. For inaccurate results, check reagent expiration and proper test strip usage. Ensure correct titration techniques and reference color charts accurately; Regular calibration of electronic testers is crucial for reliable data. Proper storage of reagents prevents degradation, ensuring consistent and precise outcomes.
4.1 Missing Reagents or Components
If reagents like R001 or R002 are missing, verify the kit contents against the inventory list. Contact the supplier if items are absent. Ensure all components are stored properly to prevent loss or damage. Double-check expiration dates, as expired reagents can lead to inaccurate results. Refer to the troubleshooting guide for alternative solutions or substitutions. Proper organization and regular inventory checks can prevent such issues. Always follow the instructions provided with the kit for optimal testing outcomes.
4.2 Interpreting Test Results

Accurately interpreting test results is crucial for maintaining water quality. Compare sample colors to the provided charts for precise readings. Ensure measurements align with recommended levels to avoid imbalances. If results are unclear, refer to the manual or consult additional resources. Proper interpretation ensures effective water treatment and prevents potential issues. Always double-check readings to confirm accuracy before adjusting chemicals.

Maintenance and Storage of the Test Kit
Proper storage in a cool, dry place is essential. Reagents should be replaced annually. Regular cleaning ensures accuracy and extends the kit’s lifespan effectively.
5.1 Proper Storage Conditions
Store the Taylor Test Kit in a cool, dry place away from direct sunlight and moisture. Keep it out of reach of children and ensure all components are securely organized. Protect reagents from extreme temperatures to maintain their effectiveness. Regularly check expiration dates and replace reagents as needed to ensure accurate test results. Proper storage extends the kit’s lifespan and reliability.
5.2 Replacing Expired Reagents
Replace expired reagents annually or as indicated by the manufacturer. Dispose of outdated chemicals safely, following local regulations. Use only genuine Taylor replacement reagents to maintain accuracy. Before use, ensure new reagents are properly sealed and stored. Regular replacement ensures reliable test results and extends the kit’s functionality, maintaining water quality monitoring effectiveness over time. Always refer to the kit’s instructions for specific guidance.

Advanced Tips for Accurate Testing
For precise results, use the comparator with natural light and ensure samples are well-mixed. Regularly clean equipment and follow reagent expiration guidelines to maintain accuracy and reliability in testing.
6.1 Using the Comparator Effectively
For accurate test results, position the comparator under soft, indirect light. Ensure the sample tube is clean and free from residue. Hold the comparator steady, aligning the color of the sample with the chart. Avoid shading the view, as this can affect color perception; Regular cleaning and proper handling will maintain the comparator’s effectiveness over time, ensuring reliable testing outcomes consistently.
6.2 Avoiding Common Testing Mistakes
Common errors include misreading color charts, using expired reagents, and incorrect sample preparation. Always ensure reagents are properly measured and added in sequence. Avoid cross-contamination by using separate containers for each test. Double-check instructions to prevent misinterpretation of results. Regularly clean and maintain equipment to ensure accuracy. Properly store reagents to maintain their effectiveness and shelf life for reliable testing outcomes every time.

Safety Precautions
Always wear gloves and goggles when handling reagents. Ensure proper ventilation and avoid ingestion or skin contact. Dispose of chemical waste responsibly, following local regulations and guidelines carefully.
7.1 Handling Chemical Reagents Safely
When handling reagents, wear protective gloves and goggles to minimize skin and eye exposure. Ensure all work is conducted in a well-ventilated area to avoid inhaling fumes. Avoid ingesting any chemicals and wash hands thoroughly after use. Store reagents in their original containers, tightly sealed, and keep them out of children’s reach. Follow the instructions provided for each reagent to ensure safe handling and optimal testing results.
7.2 Disposal of Chemical Waste
Dispose of chemical waste according to local regulations to protect the environment. Dilute leftover reagents with water and neutralize them using appropriate agents before disposal. Do not pour chemicals down drains without proper treatment. Check community guidelines for hazardous waste collection events to safely discard expired or unused reagents, ensuring they do not contaminate water supplies or soil. Always follow eco-friendly disposal practices to maintain environmental safety.

Comparing Taylor Test Kits with Other Brands
Taylor Test Kits are known for their accuracy and ease of use, making them a top choice for water testing. They offer comprehensive testing solutions, often outperforming electronic testers in reliability and cost-effectiveness, while providing clear, consistent results for pool and spa maintenance.
8.1 Key Features of Taylor Kits
Taylor Test Kits are renowned for their precision and user-friendly design, offering comprehensive water analysis for pH, chlorine, alkalinity, and calcium hardness. They include high-quality reagents, durable comparators, and clear color charts, ensuring accurate results. Each kit is tailored to specific testing needs, providing a reliable and efficient solution for maintaining optimal water quality in pools and spas. Their durability and ease of use set them apart from competitors, making them a preferred choice for professionals and homeowners alike. Additionally, Taylor Kits are backed by excellent customer support and comprehensive instructions, ensuring a seamless testing experience. This combination of features makes Taylor Test Kits a trusted name in water testing solutions.
8.2 Advantages Over Electronic Testers
Taylor Test Kits offer several advantages over electronic testers, including cost-effectiveness, no need for calibration, and simplicity. They provide reliable results without the risk of electronic malfunctions or battery issues. The use of visual color charts ensures accuracy, and the portability of the kit makes it ideal for on-site testing. Unlike electronic devices, Taylor Kits require minimal maintenance and are less prone to errors, making them a dependable choice for consistent water quality testing. Their durability and ease of use further enhance their reliability compared to electronic testers, which can be fragile and expensive to replace. These advantages make Taylor Test Kits a preferred option for many users seeking accurate and hassle-free water analysis solutions. Overall, they deliver precise results without the complexities associated with electronic devices.

Common Mistakes to Avoid
Avoid incorrect test strip usage, misinterpretation of color charts, and failing to follow instructions precisely. These errors can lead to inaccurate results and unreliable water quality assessments.
9.1 Incorrect Use of Test Strips
One common mistake is improper use of test strips, such as dipping them at an angle or not waiting the recommended time for color development. Always dip strips straight into the water and hold for the specified duration. Comparing results to the color chart accurately ensures reliable readings. Avoid touching reactive pads with fingers, as oils can interfere. Proper technique is key for consistent accuracy.
9.2 Misinterpretation of Color Charts
Misreading color charts is a frequent error, often due to poor lighting or haste. To avoid this, compare test strip colors in well-lit conditions and align them precisely with chart gradients. Use the middle of the color block for accurate matching. If uncertain, retake the test. Ensuring correct interpretation is essential for precise water quality assessment and maintaining optimal pool or spa conditions effectively.
Mastering water testing with Taylor kits requires consistent practice and adherence to instructions. Regular testing and proper kit maintenance ensure accurate results. Refer to the manual for complex issues and explore additional resources for optimal outcomes.
10.1 Best Practices for Consistent Results
For consistent results, always prepare components thoroughly and follow instructions precisely. Use the comparator correctly, ensuring color matching accuracy. Avoid contamination by cleaning equipment and storing reagents properly. Regularly calibrate tools and replace expired reagents. Double-check measurements and record results immediately. Using a white background for color comparisons can enhance accuracy. These practices ensure reliable water quality testing outcomes every time.
10.2 Resources for Further Assistance
For additional support, visit the Taylor Technologies official website for detailed manuals, troubleshooting guides, and FAQs. Online forums and YouTube tutorials offer practical demonstrations. Contact Taylor’s customer support for personalized assistance. Refer to the included instruction booklet for clarity. Explore pool maintenance communities on social media for user tips and solutions, ensuring you optimize your testing experience effectively. Utilize these resources to enhance your understanding and troubleshooting skills.